
Why Wooden Feeders Need Different Cleaning Decisions
If you are trying to figure out how to clean a wooden bird feeder, the main difference is not that wood is somehow chemically fragile. It is that wood is porous. Moisture, seed dust, droppings, and other debris can work into rough grain, seams, screw holes, and joints that are much easier to reach on a smooth plastic or metal feeder.
Wood also absorbs and releases moisture as conditions change. That means a hopper can feel dry on the outside while joints or thicker pieces are still damp. Virginia Tech notes that porous feeders can be harder to sanitize because contaminants may remain in small surface pockets and seams, while stronger or longer disinfection can affect the feeder’s appearance or finish.
When I helped troubleshoot wooden feeders in a specialty bird store, the most useful first step was usually to look closely at the base, corners, and joints rather than judge the feeder from the outside. Old seed packed into a seam or damp debris under a removable panel can be the real problem even when the larger wood surfaces still look fine.
The practical goal is therefore simple: remove as much organic material as possible, use a cleaning method the feeder can tolerate, rinse thoroughly, and do not add fresh seed until the wood is completely dry. If the wood has softened, split around a joint, or developed areas that you can no longer clean, replacement can be safer than repeatedly trying to rescue it.
Bleach and Wood: Why There Is No One-Size-Fits-All Rule
It is tempting to write a simple rule that bleach should never touch a wooden feeder, but authoritative feeder-care guidance does not support that absolute. South Carolina DNR recommends a one-part-bleach-to-nine-parts-water solution for seed feeders and specifically stresses that wooden feeders must be allowed to air-dry completely. Cornell also uses dilute bleach as a standard feeder-disinfection option, while noting that wood is harder to clean than nonporous materials.
At the same time, wood construction matters. University of Florida guidance recommends hot soapy water and a bristled brush for wooden feeders, and Virginia Tech warns that porous feeders may need more aggressive disinfection to reach contaminants while that same treatment can discolor or damage painted and stained surfaces. Those differences are why I would not automatically soak every cedar or pine feeder in bleach.
Field Note: With wooden feeders, I would inspect the joints and finish before choosing the cleaning method. A sound unfinished hopper and a painted feeder with aging glue are both “wood feeders,” but they may not tolerate the same soaking routine.
For routine maintenance on a sound wooden feeder, start with mechanical cleaning: empty it, scrape or brush away dry debris, then scrub with hot soapy water. If you are dealing with a disease concern and the feeder manufacturer or construction can tolerate bleach, a dilute one-to-nine solution can be used as a disinfecting step, followed by a very thorough rinse and complete drying. If the wood is painted, stained, glued in a way that may fail when soaked, or already cracking, use the manufacturer’s care instructions rather than forcing a generic soaking method.
Wrong approach:
Assuming that every wooden feeder must be soaked in bleach, or that bleach is always forbidden, without considering the feeder’s construction, finish, condition, and reason for cleaning.
Right approach:
Removing debris first, using hot soapy water for routine cleaning, and reserving a properly diluted disinfectant for feeders and situations where it is appropriate, followed by thorough rinsing and complete drying.
If a feeder has deep cracks, soft wood, persistent contamination in inaccessible joints, or repeated mold that returns despite proper cleaning and drying, the material itself may have become difficult to maintain safely. At that point, replacing the feeder is more practical than escalating to harsher and harsher cleaning.

Six flexible, solvent-resistant plastic scrapers in sizes 1.5, 2, 3, 4, 5, and 6 inches. Perfect for spackling, patching, and painting. A lightweight, affordable alternative to metal knives. Amazon's Choice with 4.6 stars and 3,000 plus reviews.
Check on AmazonIf you click this link and buy, we earn a commission at no additional cost to you.
A Brush-First Method for Routine Wood Feeder Cleaning
When customers asked about smooth plastic or metal feeders, I could point them to the standard soaking options in my main page on how to clean a bird feeder. Wood needs a little more judgment because the grain, joints, glue, finish, and overall condition can all affect how much water the feeder should take on.
For routine cleaning, a stiff brush and hot soapy water are a well-supported starting point for wooden feeders. Diluted vinegar is another cleaning option some feeder-care sources use, but it should not be described as equivalent to a disinfectant. Project FeederWatch specifically notes that bleach alternatives such as diluted vinegar may provide some additional protection against pathogens without necessarily meeting disinfectant standards.
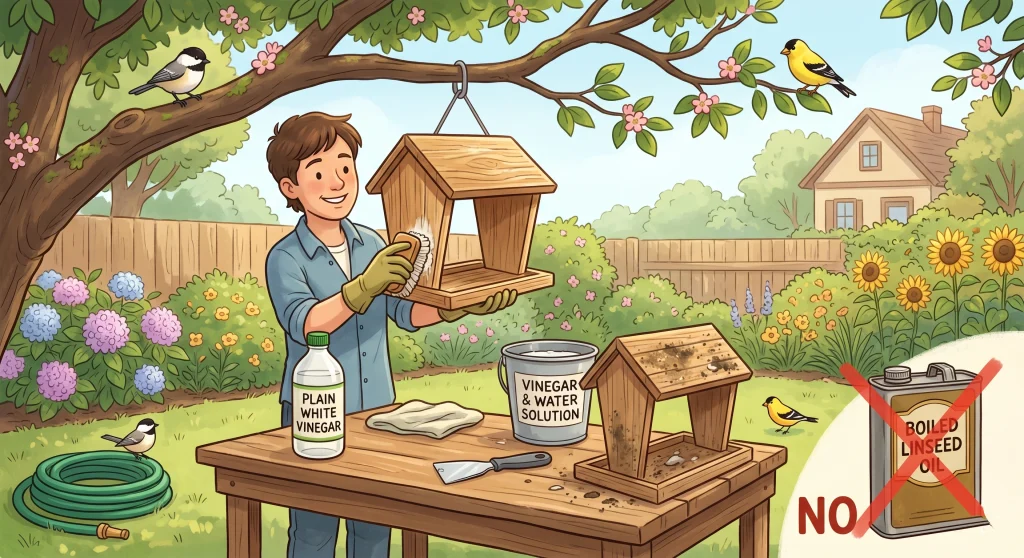
Before you start, gather tools that let you remove debris without gouging the wood:
- A stiff-bristled brush for trays, corners, and rough grain
- A plastic scraper for hardened droppings or packed seed on flat surfaces
- Hot water and a small amount of mild dish soap for routine washing
- Plain white vinegar if you choose to use a diluted vinegar wash for residue or routine cleaning
- A garden hose or other source of clean rinse water with gentle flow
Start dry. Empty the feeder and use the brush or plastic scraper to remove loose hulls, droppings, caked seed, and other debris before adding water. This keeps you from turning a dry layer of old food into a paste that is harder to remove from seams.
Next, scrub every reachable wood surface with hot soapy water, paying particular attention to the tray, base, corners, roof joints, and any place seed routinely sits. If you prefer a vinegar wash for routine cleaning, an equal-parts white-vinegar-and-water mixture is one commonly published option, but do not mix vinegar with bleach and do not rely on vinegar alone when a true disinfection step is needed.
Rinse the feeder thoroughly with clean water. A normal hose flow is enough. High pressure is unnecessary and can damage soft grain, loosen weak joints, or force more water into places that are already slow to dry.

Durable PP brush with flagged bristles that clean thoroughly without scratching surfaces. Great for bird baths, feeders, patios, tiles, grills, and more. Ergonomic handle for comfortable grip, built-in hanging hole for easy drying and storage. Measures 8.7 x 3 x 3 inches.
Check on AmazonIf you click this link and buy, we earn a commission at no additional cost to you.
Drying Time: Check the Wood, Not the Clock
Complete drying is one of the most important parts of cleaning a wooden feeder. Fresh seed placed against damp wood can absorb that moisture, clump, and spoil, undoing the work you just did.
What I would not do is promise that every cedar feeder needs exactly twenty-four, forty-eight, or seventy-two hours. Drying time changes with wood thickness, construction, humidity, airflow, how wet the feeder became during cleaning, and whether enclosed joints can drain. Official feeder-care guidance consistently emphasizes drying completely, not following a universal countdown.
Put the clean feeder in a dry, well-ventilated place with doors, lids, and removable parts open so air can reach the interior. Turn it if necessary so trapped water can drain from joints and corners. Before refilling, check the base, seams, screw holes, and thicker pieces rather than touching only the easiest outside surface.
Mastering that habit is one of those useful bird feeder tips that prevents a cleaning session from creating a new moisture problem. If the weather is humid or rainy, move the feeder to a sheltered location with good airflow rather than refilling it simply because a certain number of hours has passed.
| Conditions | What to Check Before Refilling |
|---|---|
| Dry weather with good airflow | Surface grain, base, joints, and screw holes should all be dry, not just the exposed panels |
| Thick hopper parts or enclosed joints | Open or separate removable pieces and check for trapped moisture where wood meets hardware |
| Humid, rainy, or cool conditions | Move the feeder to a sheltered, ventilated place and give it additional time until the wood is fully dry |
Once the feeder is dry, inspect it before adding seed. Cleaning often reveals loose screws, failing glue joints, splinters, or soft wood that were harder to notice when the feeder was dirty. Maintenance is a good time to decide whether the feeder is still easy enough to clean safely.
The Linseed Oil Trap: The Label Alone Does Not Prove Bird Safety
Cedar and pine naturally weather outdoors, and a gray surface is not by itself a reason to coat the feeder. If the feeder is structurally sound, leaving the wood unfinished avoids adding another material that must cure, weather, and eventually be cleaned around.
The common raw-versus-boiled linseed oil distinction is real, but it is often oversimplified. Products sold as boiled linseed oil may contain metal driers or other additives that speed curing, and formulations vary by manufacturer. That is enough reason not to assume that a generic boiled linseed oil belongs on a feeder simply because it is sold as a wood finish.
The other half of the claim needs just as much caution. Raw linseed oil is generally regarded as a simpler oil and may be sold in food-safe formulations, but that does not automatically prove that every bottle labeled raw linseed oil is appropriate for bird-feeder surfaces. I have not found strong bird-specific evidence that justifies calling it completely wildlife-safe across products, applications, and curing conditions.
Warning: Do not apply an unknown stain, varnish, polyurethane, or oil to seed-contact surfaces or perches simply because the front label sounds natural. If you finish any part of a feeder, check the complete product instructions and ingredients, keep food-contact areas untreated when possible, and allow the finish to cure fully before birds can access it.
If maintaining the original wood color is important to you, the conservative approach is to follow the feeder manufacturer’s finishing instructions or use a product specifically documented for the intended outdoor application. I would not choose an oil solely because the bottle says “raw,” and I would not choose a boiled product without knowing what driers or solvents it contains.
For many backyard feeders, the easiest maintenance path is still untreated wood: keep it clean, let it dry completely, accept normal weathering, and replace the feeder when the material becomes cracked, soft, or too difficult to sanitize.

Penetrates deep into wood grain to nourish, seal, and protect both indoor and outdoor surfaces. Slower 2 to 4 day drying process creates richer, longer-lasting conditioning than boiled linseed oil. Restores worn furniture, resists moisture and weather, and enhances natural luster. Simply brush or wipe on, and can be mixed directly into oil-based paints and stains.
Check on AmazonIf you click this link and buy, we earn a commission at no additional cost to you.
Final Thoughts: Cleanability Matters More Than Color
A wooden feeder does not need to look new to remain usable. Weathering, fading, and a gray surface can be cosmetic changes, while trapped moisture, soft wood, deep cracks, old seed in inaccessible seams, and recurring mold are the problems that deserve your attention.
Focus on the maintenance you can verify. Remove debris, scrub the feeder with a method appropriate for its construction, disinfect when the situation calls for it, rinse thoroughly, and wait until the wood is fully dry before refilling. Avoid treating vinegar as a guaranteed disinfectant or treating bleach as universally forbidden.
The same caution applies to finishes. Untreated wood is often the simplest choice, especially around seed-contact surfaces. If you decide to coat the exterior, use the feeder manufacturer’s guidance or a clearly documented product, let it cure completely, and keep maintenance access in mind. A finish that makes the feeder harder to clean is not much of an upgrade.

Fandeli Multi-Purpose Sanding Paper includes 50 assorted sheets for general sanding and surface preparation. The 80, 120, and 220 grit selection covers coarse material removal through smoother finishing on wood, metal, paint, and other common surfaces. The full-size sheets can also be cut down for hand sanding blocks or smaller maintenance jobs around bird feeders and birdhouses.
Check on AmazonIf you click this link and buy, we earn a commission at no additional cost to you.
FAQs
🧼 Can I use mild dish soap on a wooden feeder?
Yes. University of Florida guidance specifically recommends hot soapy water and a bristled brush for wooden bird feeders. Use a mild soap, rinse the feeder thoroughly, and let the wood dry completely before adding fresh seed.
🚿 Should I power wash my cedar bird feeder?
I would avoid high-pressure washing. A stiff brush and gentle rinse give you much more control and are less likely to raise soft grain, damage a weak joint, or drive extra water into seams that take a long time to dry.
🖌️ Is it safe to paint the outside of a wood bird feeder?
Do not assume any exterior coating is automatically appropriate for a feeder. If the manufacturer allows an exterior finish, use a product documented for that application, keep seed-contact surfaces and perches untreated when possible, and let the coating cure completely before rehanging the feeder.
🦠 How do I remove black mold spots that won’t scrub off?
Dark staining is not proof that active mold remains, so start by cleaning and drying the feeder thoroughly. Once the wood is dry, light sanding can remove superficial staining or rough surface material, but replace the feeder if the wood is soft, deeply cracked, rotting, or repeatedly develops contamination in areas you cannot clean.


