Why Your Bird Feeder Maintenance Needs a Real Schedule
A feeder can look acceptable from a few feet away while old seed and droppings are collecting around the ports, tray, base, or seams. That matters because wet or decomposing seed can support mold, and contaminated surfaces can contribute to disease transmission when many birds repeatedly use the same feeding spot.
When I worked in a specialty bird store, cleaning was one of the first maintenance questions I asked when someone described clumped seed, blocked ports, musty food, or a feeder that had not been taken apart in a long time. The useful habit is not waiting for obvious black growth or a bad smell. It is building cleaning into the same routine as refilling and checking the seed.
Key point: A feeder does not need to look filthy before it needs attention. Old seed, hulls, droppings, and moisture can collect in places that are easy to miss from the outside.
For seed feeders, Cornell Lab guidance uses about once every two weeks as a practical baseline, with more frequent cleaning during heavy use or wet weather. Hummingbird feeders need a different routine because sugar water spoils quickly: clean the feeder at least weekly, change the nectar every three to five days, and do both more often in hot weather. If seed gets wet, clumps, smells musty, or shows visible mold, discard it and clean the feeder instead of waiting for the calendar.
Disease changes the routine again. If you see a bird that appears sick, such as one with crusty or swollen eyes, unusual lethargy, or persistently fluffed feathers, clean and disinfect the feeding area and follow current wildlife-health guidance about temporarily removing feeders. CDC guidance advises removing feeders and birdbaths for two weeks after finding a sick or dead bird, while Project FeederWatch notes that local conditions can affect whether temporary removal helps. The important point is not to clean a contaminated feeder and immediately treat the problem as finished.
Vinegar vs. Bleach: Choosing the Right Cleaner
Bleach and vinegar are often discussed as if they are interchangeable, but they are not. For seed feeders that can tolerate it, a dilute household bleach solution is the better-supported disinfecting option when disease control is the goal. Project FeederWatch and Cornell commonly recommend one part bleach to nine parts water after visible debris has been removed.
Vinegar can still be useful as a cleaning alternative, especially when you want help loosening mineral deposits or residue and the feeder material or manufacturer calls for a gentler method. However, Project FeederWatch notes that bleach alternatives such as diluted vinegar may not meet the same disinfectant standards. That is why I would not describe vinegar as an equal substitute when you are responding to a suspected disease problem.
For ordinary seed-feeder maintenance, warm soapy water is also an accepted cleaning method when the feeder can be rinsed thoroughly. Hummingbird feeders are the exception worth remembering here: Cornell currently recommends hot water and a bottle brush without soap or detergent for routine cleaning, with dilute bleach as an option when a deeper cleaning is needed.
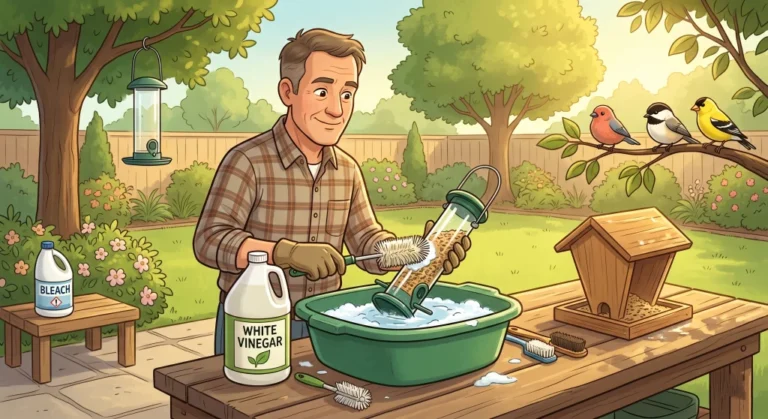
Warning: Never mix bleach and vinegar together. The combination can release toxic chlorine gas. Use one cleaning method at a time, work in a well-ventilated area, and rinse the feeder thoroughly before it goes back outside.
Whatever cleaner you choose, remove the physical debris first. Hardened seed dust, droppings, and residue around ports and seams need scrubbing; soaking alone does not reliably remove the material that is stuck to the feeder.
The Step-by-Step Cleaning Process
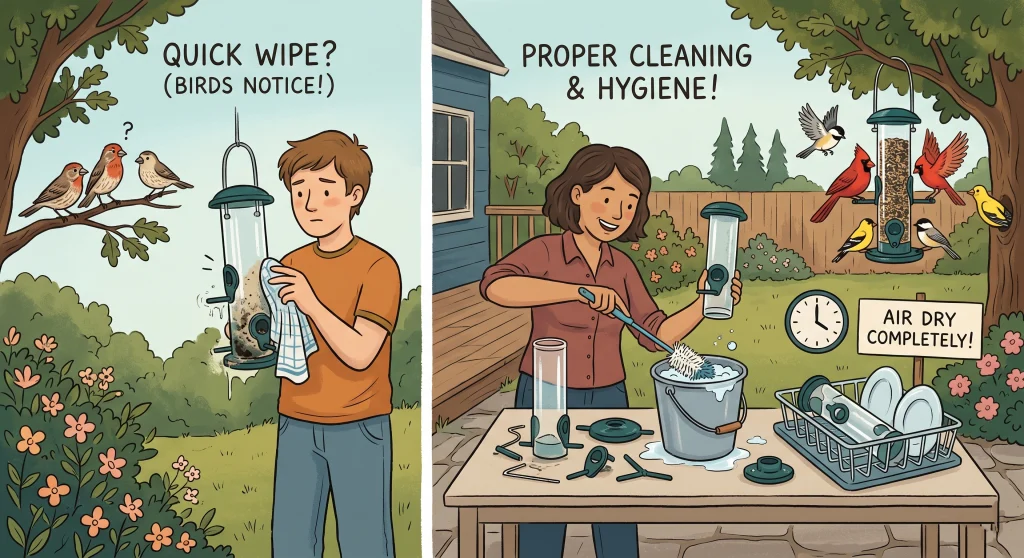
A useful cleaning routine has four jobs: get rid of old food, reach the hidden surfaces, remove stuck debris, and return the feeder completely clean and dry. Skipping one of those steps is how a feeder that looks washed can still end up with wet seed packed into a dirty base.
Take It Completely Apart
Empty the remaining seed and discard anything that is wet, moldy, musty, or mixed with droppings. Do not scatter questionable seed on the ground. If the feeder is designed to come apart, remove the base, lid, perches, ports, trays, and any other pieces you can safely detach so you can reach the seams where residue accumulates.
Soak and Scrub
Start by removing visible debris with hot water, soap where appropriate, and a brush. If you are disinfecting with bleach, a one-part-bleach-to-nine-parts-water solution with about a ten-minute soak is a widely used recommendation from Cornell, CDC, and Project FeederWatch. Scrub the tube, base, ports, perches, and other contact surfaces instead of assuming the soak will do all the work.
A long bottle brush is useful for tubes, while a smaller brush can reach ports, threads, and corners. Keep these tools for feeder cleaning rather than rotating them back into kitchen use.
Field Note: I saw plenty of feeders blamed on bad hardware when the real problem was compacted seed dust hidden in the base or around a port. If seed flow changes, taking the feeder farther apart than you normally do is often more useful than poking at the opening from the outside.

This 19-piece hummingbird feeder cleaning set includes three brush sizes for reaching reservoirs, feeding ports, bottle holders, and other narrow areas. The largest brush has a double-ended design for cleaning both nectar bottles and smaller feeder components, while the medium and small brushes handle tighter spaces. Nylon bristles combined with stainless steel and plastic handles provide a practical reusable set for routine bird feeder cleaning.
Check on AmazonIf you click this link and buy, we earn a commission at no additional cost to you.
Rinse Thoroughly
After scrubbing or disinfecting, rinse every piece thoroughly with clean water. This is especially important after bleach or soap. Do not use smell alone as your test; flush ports, seams, reservoirs, and other places where cleaner can collect, then set the pieces where water can drain away.
Let Every Part Dry Completely
Complete drying matters because adding dry seed to a damp feeder immediately reintroduces the moisture you were trying to remove. Official feeder-care guidance consistently says to let feeders dry completely before refilling.
The common mistake is not the mere act of touching a feeder with a towel. The problem is assuming that a quick wipe means the feeder is dry when water is still sitting inside a seam, screw thread, port, or wooden joint.
Drying time depends on the material, weather, and feeder design, so there is no useful universal overnight rule. Check the parts themselves. If you can still find trapped water, the feeder is not ready for fresh seed.
The Big Exception: How to Handle Wood Feeders
Wood feeders deserve extra care because porous material can hold moisture longer and can be harder to scrub than smooth plastic, metal, or glass. That does not mean bleach is automatically forbidden. South Carolina DNR guidance, for example, recommends a dilute one-to-nine bleach solution for seed feeders and specifically emphasizes allowing wooden feeders to air-dry completely before refilling.
Before soaking a wooden feeder, check how it is built and whether the manufacturer gives material-specific cleaning instructions. Glue joints, finishes, paint, and hardware may limit how aggressively you can soak or scrub the feeder. Remove loose debris, clean every reachable surface, rinse thoroughly, and give the wood as much time as it needs to dry all the way through.
Vinegar can be an alternative cleaning option, but I would not present it as mandatory for every wooden feeder or as an equal disinfectant during a disease concern. The practical limitation with wood is cleanability and drying, not a universal rule that bleach becomes permanently trapped in every piece of cedar or pine.
The Hidden Culprit: Check Your Seed Storage Too
If a clean feeder keeps developing clumped, musty, or moldy seed, do not keep blaming the feeder. Check the food you are putting back into it. Seed stored in a warm, damp garage or shed can absorb moisture, develop mold, or become infested before it ever reaches the feeding station.
This was an easy thing to overlook in store troubleshooting because people naturally focused on the equipment hanging outside. I learned to ask where the seed was stored, whether the bag had gotten damp, and what the storage container looked and smelled like before suggesting another feeder-cleaning cycle.
When you do routine maintenance, inspect both the seed and the container. Keep bird seed in a cool, dry place, discard any batch that is visibly moldy or smells musty, and clean a storage bin if it contains old residue, moisture, or contaminated seed before adding a fresh batch. For a broader setup and maintenance overview, refer to our bird feeder tips page. A clean feeder cannot keep bad seed from being bad seed.

An airtight bird seed storage container made from food-grade, BPA-free HDPE plastic. Features Gamma Seal technology with a threaded locking lid and double gaskets to lock in freshness and keep out pests, ants, and moisture. Shatter-resistant and suitable for indoor, garage, or outdoor use. Also works for dog, cat, and other dry pet food. Made in the USA.
Check on AmazonIf you click this link and buy, we earn a commission at no additional cost to you.
Don’t Forget the Ground Underneath
Cleaning the hanging feeder is only part of feeder hygiene. Hulls, uneaten seed, and droppings collect underneath, and wet piles can mold while also attracting rodents and other unwanted wildlife. Cornell, CDC, and wildlife agencies routinely include ground cleanup in their feeder-care recommendations for this reason.
Ground-feeding birds such as doves, juncos, and many sparrows may forage directly below elevated feeders, so leaving spoiled food and droppings in that feeding area defeats part of what you accomplished by cleaning the feeder itself. Rake or sweep up accumulated waste regularly, and remove it rather than redistributing it elsewhere in the yard.
If the feeder sits over a deck or patio, clean the surface as well. Wear gloves, wash your hands after handling dirty feeders or waste, and avoid bringing feeder-cleaning tools into food-preparation areas. CDC recommends cleaning feeders outdoors when possible, or using a laundry sink or bathtub rather than the kitchen if indoor cleaning is necessary.
More Bird Feeder Cleaning Help
The basic process stays consistent, but frequency, feeder material, nectar, seed storage, and cleanup below the station each create their own maintenance questions. Use the topic that matches the problem you are actually seeing instead of making every feeder follow one identical routine.
| Topic | Description |
|---|---|
| How Often to Clean Bird Feeder | How weather, bird traffic, wet seed, and disease concerns can change the normal cleaning schedule. |
| How to Clean Hummingbird Feeder | How nectar-feeder cleaning differs from seed-feeder maintenance, including frequent nectar changes and careful port cleaning. |
| Clean Bird Feeder With Vinegar | Where diluted vinegar fits into feeder cleaning and when a true disinfecting step is the better choice. |
| How to Store Bird Seed | How to keep seed cool and dry, inspect it for mold, and keep the storage container from becoming part of the problem. |
| Clean Bird Poop Off Deck | How to clean the surface underneath a feeder while accounting for the deck material and finish. |
| Clean Wooden Bird Feeder | How to clean porous wood, work around finishes and joints, and make sure the feeder dries completely before refilling. |
If you only change one habit, make it this: inspect the feeder, the food, and the ground underneath as one system. Cleaning the tube while ignoring damp seed or a pile of waste below it leaves the easiest problems untouched.
Final Thoughts: Clean Feeders Reduce Avoidable Risk
Nobody starts feeding birds because scrubbing feeder ports sounds fun. It is routine maintenance, but it has a clear purpose: removing spoiled food and contaminated debris from a place where birds repeatedly gather.
Use a regular schedule as your baseline, then clean sooner when wet weather, heavy use, mold, or illness gives you a reason. Take the feeder apart, scrub what you can actually see, disinfect when appropriate, rinse thoroughly, and wait until every part is dry before refilling. That is a much stronger maintenance habit than waiting for the feeder to look dirty enough to demand attention.

A plant enzyme-based bird feeder cleaner that safely removes seed residue and water lines from wood, plastic, metal, and ceramic feeders. Free from harmful chemicals, making it safe for birds and feeders alike. Made in the USA.
Check on AmazonIf you click this link and buy, we earn a commission at no additional cost to you.
FAQs
🧼 Can I use dish soap to clean my bird feeder?
For ordinary seed feeders, mild dish soap is an accepted cleaning option if you rinse every surface thoroughly and let the feeder dry completely. For hummingbird feeders, Cornell recommends routine cleaning with hot water and a bottle brush without soap or detergent, so I use that more conservative approach for nectar equipment.
🌡️ Are plastic bird feeders dishwasher safe?
Some are, but do not assume every plastic feeder can handle a hot dishwasher cycle. Cornell lists a hot dishwasher as an effective cleaning option for suitable feeders, so check the manufacturer’s instructions first and hand wash the feeder if heat could warp or damage its parts.
❄️ Do I need to clean my feeder as often in the winter?
Do not automatically stretch the schedule just because temperatures are low. About every two weeks remains a useful baseline for seed feeders, and wet weather, heavy use, spoiled seed, or disease concerns are reasons to clean sooner in any season.
🦠 Is the black stuff on my feeder definitely mold?
Not necessarily. Dark buildup can include dirt, old food, droppings, or biological growth, and you usually cannot identify it reliably by color alone. Remove the buildup, clean the feeder thoroughly, disinfect when appropriate, and do not refill until every part is dry.