The Reason Most Poles Fail
The core problem with a freestanding feeding station is leverage. A feeder, seed, hanging arms, trays, and wind all put force on a relatively narrow base. Soft soil, an undersized anchor, loose modular joints, or a pole that starts slightly out of level can make that movement more obvious over time.
Many feeder poles use a step-in stake, corkscrew auger, stabilizer, patio base, or another purpose-built foundation. I do not assume a six-inch spike is automatically bad or that every pole needs a hand-dug hole. The important question is whether the base is being installed the way that specific system was designed and whether its load rating fits what you plan to hang from it.
If you are shopping for a new setup, look beyond the advertised height. Check the base design, pole diameter, joint construction, rated load, and whether a stabilizer is available. A well-designed modular pole can be very stable when installed correctly, while a heavy pole can still lean if its foundation is wrong for the soil or load.
Field Note: One pattern I saw repeatedly was a customer blaming the pole after a station started leaning, only to find that the base had never been fully seated or stabilized. Before replacing hardware, I would check the base, the level, the soil, and the load hanging above it. A small setup problem at ground level can look like a bad pole once several feeders are attached.

A sturdy, weatherproof bird house pole with a 14-inch auger anchor that screws securely into any soil type - no tools or pounding required. Made from 1-inch stainless steel with a rust-resistant powder coating for year-round durability. Adjustable height up to 88 inches via modular 14-inch segments. The 4x4-inch top platform supports birdhouses, feeders, smart cameras, or solar panels, with additional side mounting options. Setup takes about 15 minutes.
Check on AmazonIf you click this link and buy, we earn a commission at no additional cost to you.
Choosing the Right Spot First
Before you dig or twist an auger into the lawn, decide where the finished station needs to sit. Moving a properly installed pole later is possible, but it is a nuisance. I want the location to work for bird safety, viewing, maintenance, and squirrel control before I start setting the base.
The familiar 5-7-9 idea is useful as a reminder that squirrels can approach from below, from the side, and from above, but I would not treat those three numbers as fixed biological limits. Wild Birds Unlimited recommends the top of a pole baffle around four and a half to five feet above the ground, and many of its standard baffled-pole recommendations call for roughly ten to eleven feet of clearance from sturdy launch points. Some squirrel-resistant feeder setups can work with less lateral clearance. The practical test is whether a squirrel can bypass the pole and baffle from a tree, fence, railing, roof, or other structure.
You also need useful cover for birds without creating an easy ambush or jump point. If you follow fundamental backyard bird feeder tips, a distance of about ten feet from shrubs or trees is a reasonable starting compromise in many yards. It gives birds nearby escape cover while reducing easy squirrel launches and hiding places for roaming cats. Adjust that distance for the actual vegetation and predator pressure around your station.
Use the Depth Your Pole System Requires
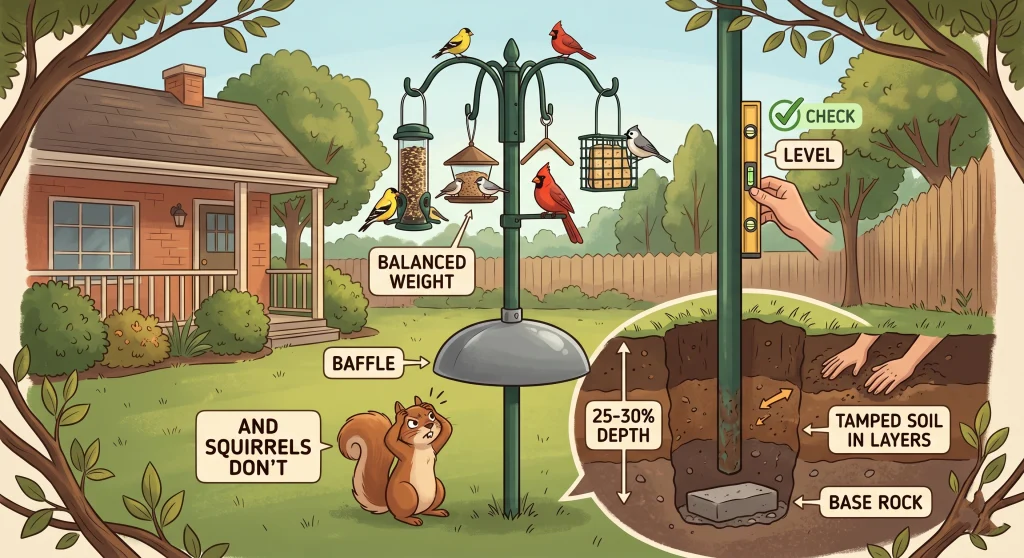
You will sometimes see a generic recommendation to bury roughly one-quarter to one-third of a post. That can be a useful starting concept for some direct-bury posts, but it is not a universal engineering rule for bird feeder poles. A screw-in auger system may specify a much shallower insertion depth plus a stabilizer, while a tall heavy-duty station may require a long ground stake or a concrete footing.
That means an eight-foot finished station does not automatically need two or two and a half feet of the visible pole buried. Some systems achieve their height by adding an extension above a separate base section. Others are designed around a ground socket that stays in the soil while the pole slides over it. The manufacturer’s instructions should win over a percentage copied from a fence-post rule.
Soil matters too. Firm mineral soil, loose garden fill, saturated clay, sand, sloped ground, frost heave, and frequent high wind do not hold the same anchor equally well. If the supplied base cannot sit firmly and plumb in your site, upgrade the foundation or choose a different mounting system rather than simply guessing at a deeper hole.
| Pole Base Type | Installation Starting Point | What to Check |
|---|---|---|
| Corkscrew or auger base | Install to the manufacturer’s specified depth | Full auger engagement, vertical pole, and any required stabilizer |
| Step-in ground stake | Use only within the load and soil conditions the system is designed for | Movement after rain, soft soil, and whether extra stabilization is available |
| Direct-bury post | Follow the post or pole maker’s embedment guidance | Soil compaction, frost conditions, drainage, and finished feeder height |
| Heavy or tall station | Use the specified ground stake, footing, or concrete installation | Total load, wind exposure, local frost conditions, and manufacturer instructions |
Pro Tips: Do not add six inches or another arbitrary amount just because your yard is windy. If wind, frost, slope, or soft soil is a concern, use a deeper or more robust foundation that is actually compatible with the pole system. A stabilizer, longer approved anchor, patio base, or properly specified footing is more predictable than improvising.
Step-by-Step Bird Feeder Pole Installation
Before breaking ground in the United States, contact 811 or your state utility-marking service and wait for buried utilities to be marked. Outside the U.S., use the local equivalent. A bird feeder pole may feel like a small project, but a shovel or auger can still hit a shallow utility line.
Start with the instructions for the base you actually own. If it has a corkscrew auger, use the leverage point provided by the manufacturer and screw the base into the soil to the required depth. If it uses a separate stabilizer, install that too. If it is a true direct-bury post, dig a hole sized for that system rather than assuming every pole should be driven or buried the same way.
For a direct-bury installation, this is the sequence I use as a practical framework:
- Mark utilities before digging: Confirm the area is clear before using a post-hole digger, spade, or auger.
- Set the base to the specified depth: Follow the pole or anchor instructions. Do not substitute a generic percentage when the hardware gives you an actual installation method.
- Level it in two directions: Hold a bubble level against the pole and check from two sides before you finish backfilling or tightening the stabilizer.
- Compact direct-bury backfill in stages: If the system relies on packed soil, return the soil in layers and firm it around the post while checking the level. Do not do this around an auger or engineered base that is supposed to be installed another way.
A flat rock under a hollow pole is not a universal requirement, and it can interfere with an auger or purpose-built ground stake. Use one only when the installation design actually calls for a firm bearing surface. The same principle applies to concrete: it can be appropriate for a heavy station, but it should not be added automatically to a removable pole system.

A heavy-duty bird feeder pole with a 14-inch auger base that twists securely into any soil. Made from 1-inch thick metal with double-layer powder coating that resists rust, UV, and extreme temperatures. The universal 4x4-inch mounting plate fits most feeders, bird houses, and smart cameras. Available in three heights - 60, 73, or 109 inches. Holds up to 20 lbs. Easy tool-free setup. Bird feeder not included.
Check on AmazonIf you click this link and buy, we earn a commission at no additional cost to you.
Balancing Weight on Multi-Arm Poles
A multi-arm station adds more weight and more wind area than a single small feeder, so the total load rating matters. I check the capacity of the pole, the individual arms, the joints, and the base before I start filling every hook. Seed gets heavy quickly, especially in a large hopper after rain has added moisture to the outside of the feeder.
Keeping heavy feeders reasonably balanced around the centerline can reduce unnecessary side loading, but an uneven pair of feeders does not automatically make a properly engineered pole lean. The bigger mistake is exceeding the rated capacity or hanging a large heavy feeder far out on an arm that was designed for something smaller. Move loads closer to the center when the hardware allows it and use arms that are rated for the feeder weight.
Do not add a wind chime, hanging plant, or other object simply as a counterweight. That adds more weight and potentially more wind load to the same pole. If a three- or four-arm station moves excessively, improve the approved foundation or stabilizer, reduce the load, or use a heavier system rather than inventing ballast.

This 76-inch heavy-duty bird feeder pole uses three hanging hooks for bird feeders, planters, lanterns, wind chimes, and other outdoor accessories. The metal pole includes a five-prong base for improved ground stability and can be adjusted to several heights for different backyard setups. Its triple-hook design provides multiple hanging points while keeping feeders organized around one compact station.
Check on AmazonIf you click this link and buy, we earn a commission at no additional cost to you.
Securing the Squirrel Baffle
A climbable pole needs a properly sized baffle if squirrel resistance is part of the goal. Long cylindrical raccoon baffles and tapered squirrel baffles solve slightly different access problems, so I choose one that fits the pole diameter and the animal pressure in the yard rather than assuming one shape is always superior.
Placement matters. Wild Birds Unlimited commonly recommends mounting a pole baffle so the top is roughly four and a half to five feet above the ground, with the feeders above it. The baffle also needs enough clearance from nearby structures that squirrels cannot jump around it. A perfect baffle on a pole beside a deck rail is still an easy station to defeat.
The larger clearance around the pole is just as important as the baffle height. For a conventional baffled pole, roughly ten to eleven feet from sturdy side launch points is a stronger starting target than a rigid seven-foot rule. Some squirrel-resistant feeder systems may allow less. Look overhead as well, because branches and roof edges can create routes that never touch the pole.
Figuring out how to set up a bird feeder correctly also means installing the baffle collar according to its instructions. Tighten the set screw enough to keep the collar from sliding, but do not deliberately gouge through the pole coating. Damaging a protective finish can create a rust point and is not necessary for a secure installation.
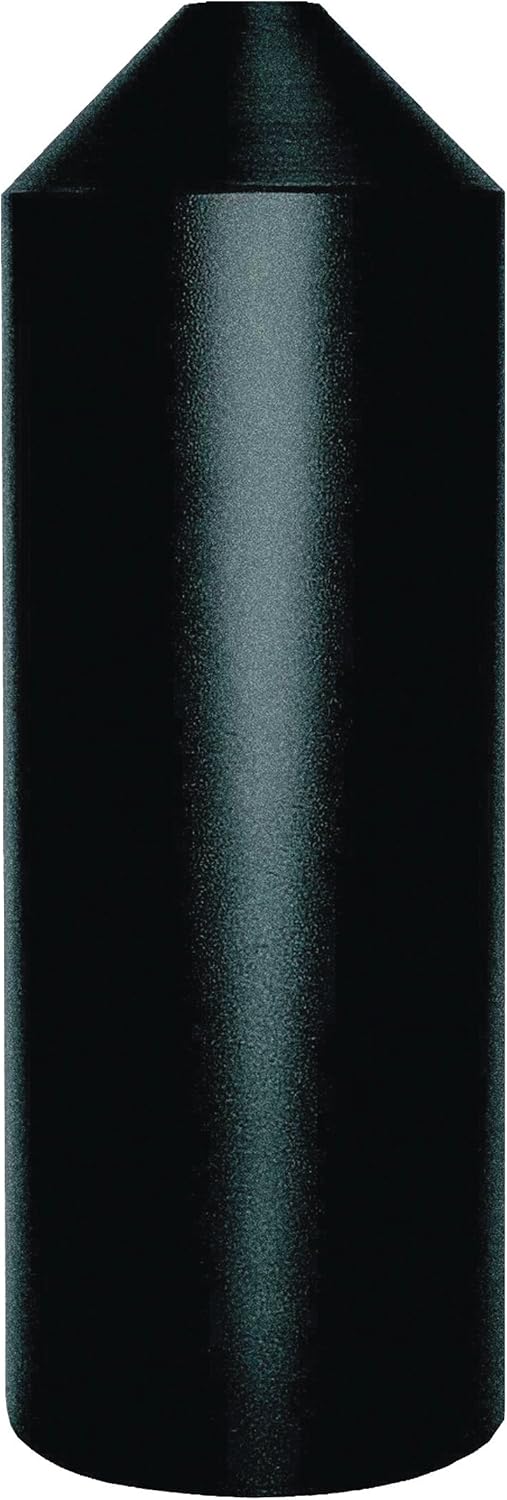
A torpedo-shaped steel squirrel baffle with a textured powder-coated finish. Measures 6.125 inches in diameter and slides onto any pole ranging from 1/2 to 1-3/8 inches in diameter via an included coupler. Easy to install - simply remove the zip tie and secure the coupler around the pole. Pole not included.
Check on AmazonIf you click this link and buy, we earn a commission at no additional cost to you.
Annual Pole Maintenance
A well-installed pole still deserves a quick inspection a few times a year, especially after severe wind, saturated soil, or a freeze-thaw season. Check it from two directions with a level instead of judging by eye. If it has shifted, correct the base according to the mounting system rather than repeatedly bending the upper pole back into position.
Check the baffle collar, arm connections, modular joints, and any stabilizer hardware at the same time. Tighten loose fasteners to the level specified by the hardware, and replace bent or cracked parts rather than compensating with extra load on the opposite side.
Finally, inspect the point where the pole meets the soil and any places where the protective finish has chipped. Remove loose rust and use a compatible touch-up coating if the manufacturer allows it. Do coating work away from feeders and seed, let it cure fully, and avoid spraying hardware while birds are using the station.

Heavy-duty manual post hole digger with curved carbon steel blades for cutting into compact soil and lifting dirt efficiently. The 58-inch fiberglass handles provide leverage while reducing the need to bend during fence, mailbox, and planting projects. Anti-slip grips and reinforced construction make it suitable for repeated outdoor digging work.
Check on AmazonIf you click this link and buy, we earn a commission at no additional cost to you.
FAQs
🧱 Should I use concrete to secure my bird feeder pole?
Only if the pole system or site conditions call for it. Many auger-and-stabilizer systems are designed to install without concrete, while tall or unusually heavy stations may use a concrete-set ground stake. Follow the installation method for the hardware you own instead of treating concrete as always necessary or always wrong.
🦶 Do those step-in pole prongs actually work?
They can work for the lightweight loads and soil conditions they were designed to handle. If a step-in base keeps loosening after rain or under a heavier multi-feeder station, use an approved stabilizer, auger, ground socket, or heavier base rather than assuming the same short prong should support every setup.
🪨 How do I install a pole in hard clay or rocky soil?
First have buried utilities marked before digging. Then follow the base manufacturer’s options for hard or rocky ground. A compatible auger, pilot hole, heavier ground socket, or weighted patio base may be better than forcing a stake where it cannot seat properly.
🐿️ Can I put grease on the pole instead of buying a baffle?
No. Wild Birds Unlimited specifically warns against grease, petroleum jelly, oil, and similar slippery coatings on feeder poles because they can contaminate feathers and fur and may be ingested during grooming. Use a physical baffle or squirrel-resistant feeder instead.